How To Add A Server
In this article we’ll help you connect your server to BeepBackup.
Overview
Connecting your server is an easy process, which involves three steps:
- Navigate to Servers and click “Add New Server”.
- Copy the public key, and add it to your
authorized_keysfile. Click “Next”. - Provide the SSH connection details for the server. Click “Create Server”. BeepBackup will automatically check the connection details. After successfully connecting the server you can start to set up new backups!
Below we’ll explain every step in more detail.
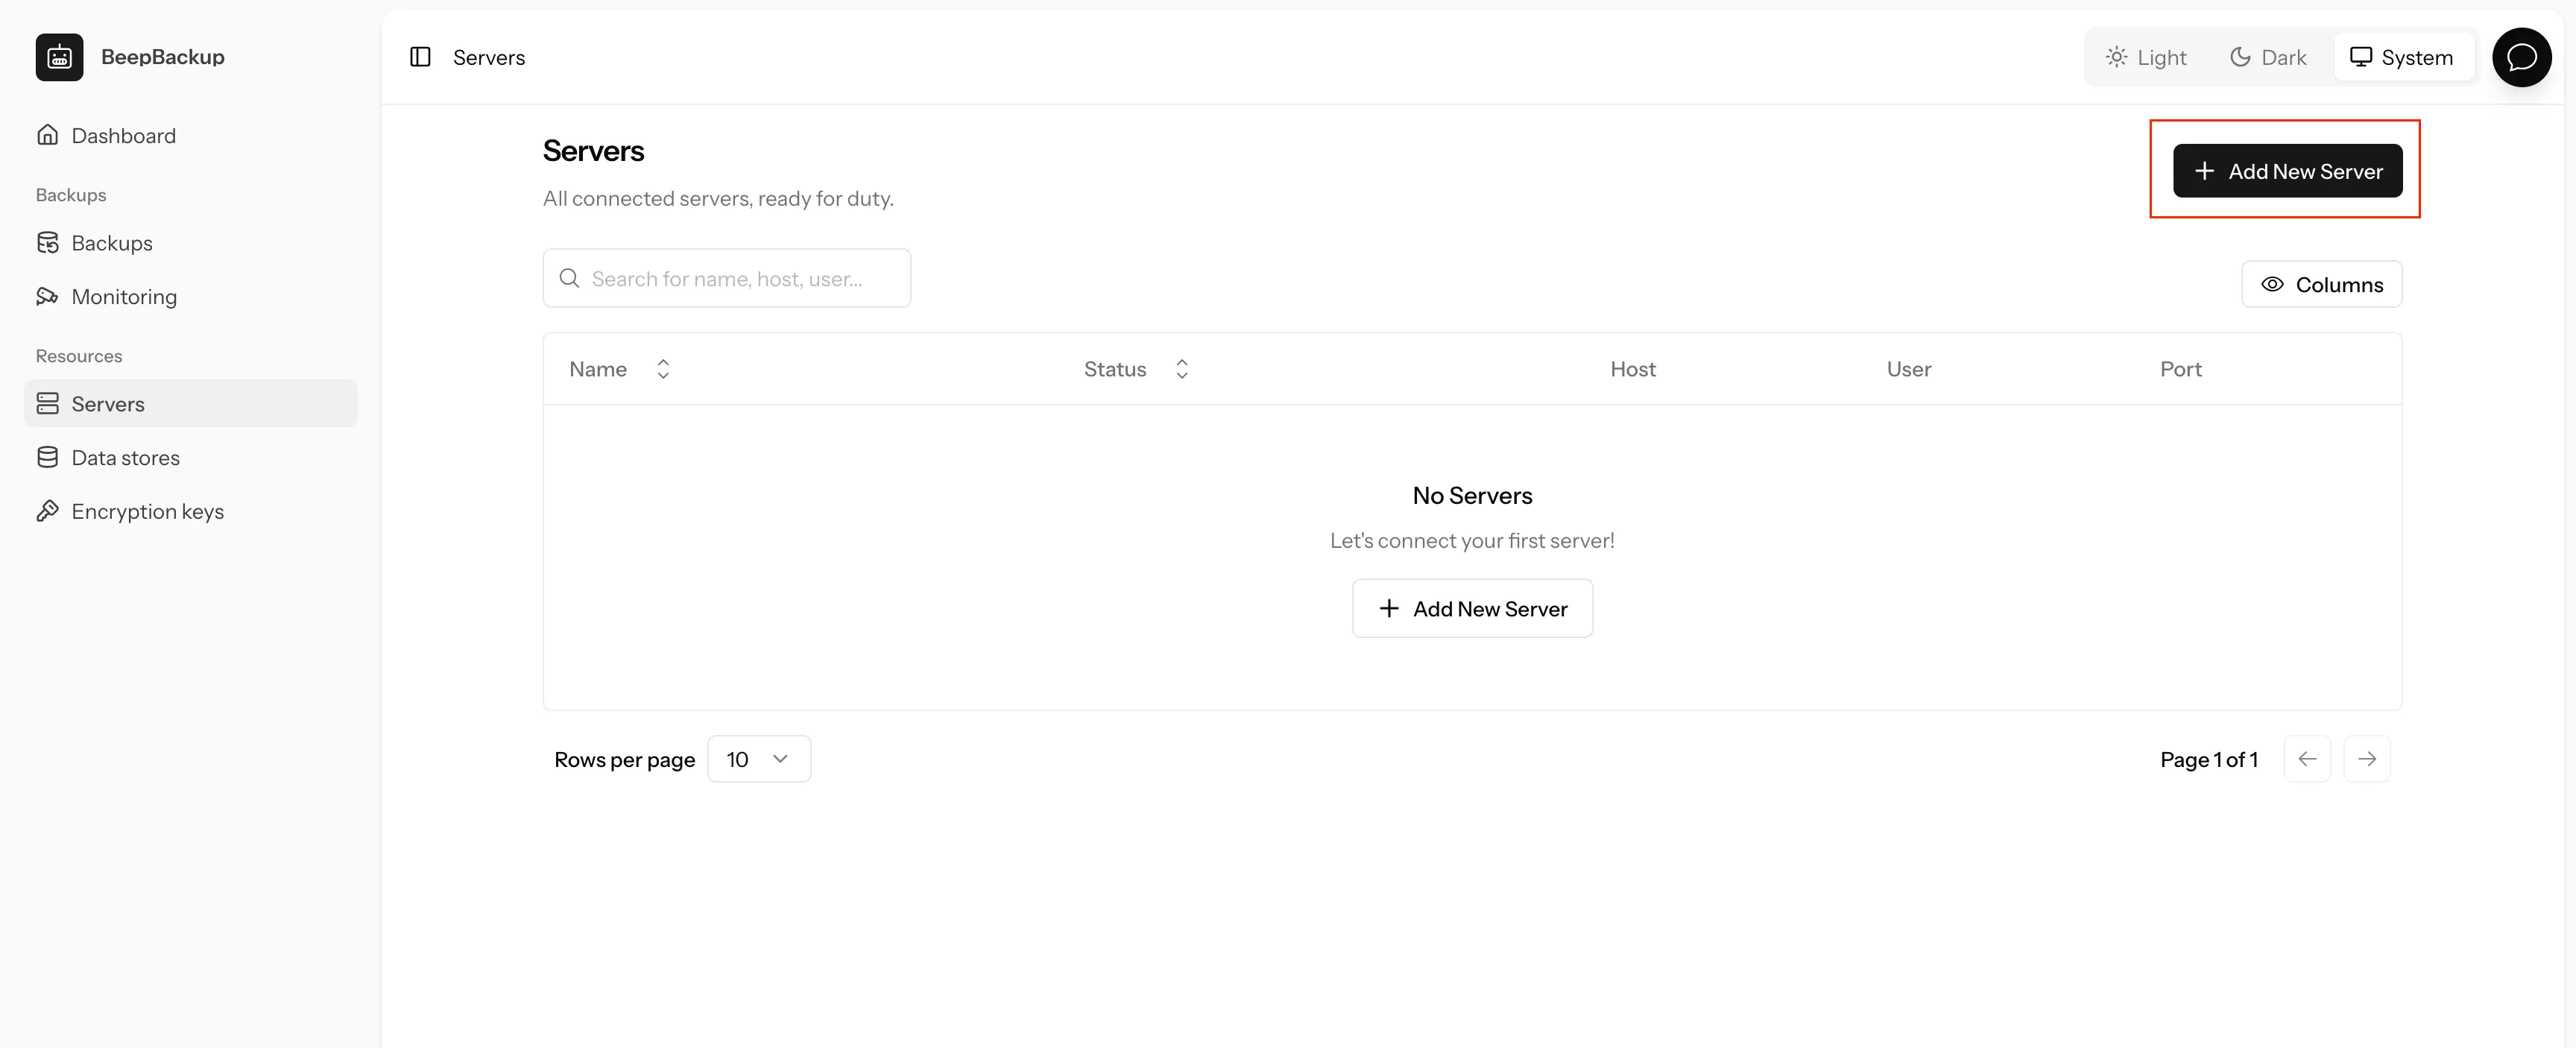
Step 1: Navigate to Servers and click “Add New Server”
This should be easy-peasy. Go to Servers and click “Add New Server”.
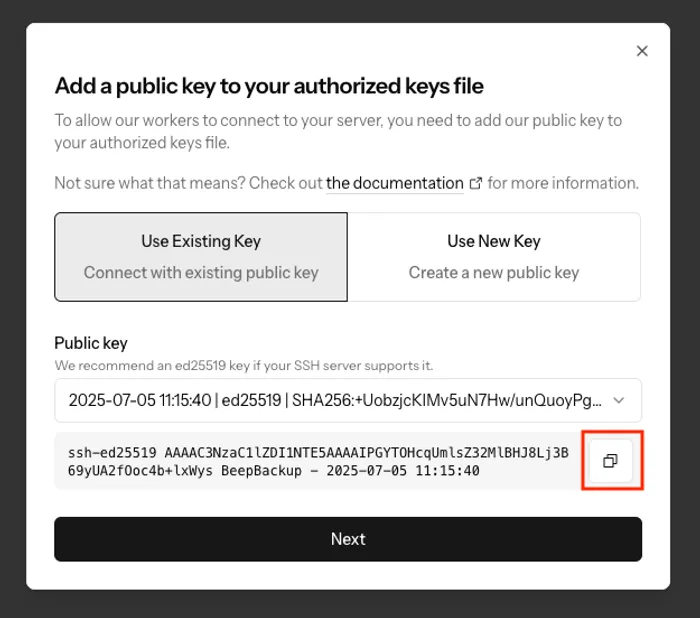
Step 2: Adding the public key to your authorized_keys file
Using SSH keys is a secure method to connect to servers. After setting up your server to work with SSH keys, we highly recommend you disable password logins for your servers! We don’t support SSH password logins.
To allow BeepBackup to connect to your server, you need to add our public key to the authorized_keys file on your server.
The steps are as follows:
- Select the key you want to use. We recommend the ed25519 type, but you can also use one of the others. Copy the public key from the interface
- Connect with SSH to your server (i.e.
ssh myuser@myhost -p 22) - Check where the
authorized_keysfile is located. This is usually at~/.ssh/authorized_keys. - Append the public key to the
authorized_keysfile. Either open the file with your favorite editor and paste the public key in, or runecho "the_public_key_you_copied" >> ~/.ssh/authorized_keys
That’s it! Now let’s continue to the next step.
Step 3: Provide the SSH connection details
In the next step you need to tell BeepBackup where your server is located, and how to connect to it.
- Provide the server connection details:
- Name: a recognizable name, so you can find it back later in the interface.
- Host: either the ip-address or the hostname of the server.
- User: the SSH user to connect to the server.
- Port: the port your SSH server is reachable at.
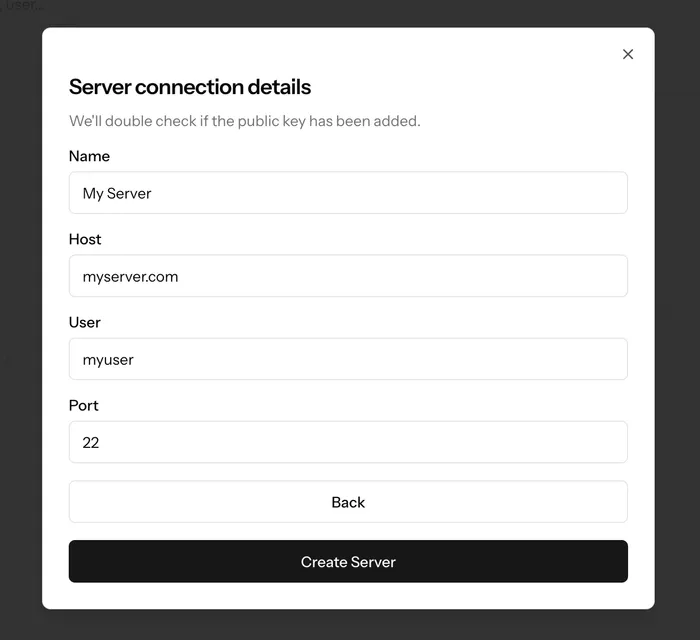
- Click “Create Server”. BeepBackup will automatically check the server connection for you.
All done! Now that you’ve successfully connected the server, you can set up backups for it.
Next Steps
Since you’ve now connected your first server, you probably want to connect your first S3 data store. Your backups need to be saved somewhere after all…